


- 5:42 PM
- 0 Comments

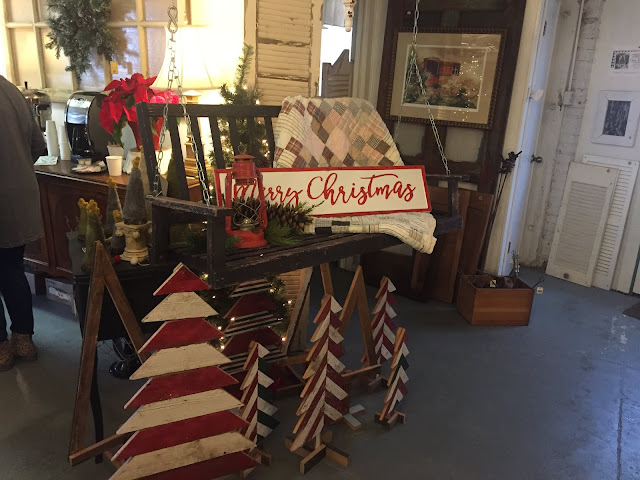
They are located at 506 Maple Street in Carrollton. Click here to check out their Facebook page.


- 10:29 AM
- 0 Comments

We know most of you are busy preparing for Christmas. The last thing you need is another to-do list. So we are going to keep our list short and sweet. This blog post is for shop owners. But even if you are a dealer please feel free to share this with a shop owner. We wanted to share three easy ways to get some extra holiday traffic. Remember this is just traffic and the customers might not be spending at first. But fingers crossed they just might. If your store makes a good impression on them they will remember you and shop at a later date or even better they will tell their friends about you.
1. Toy Donation Center
There are different toy drives you can do or participate in this time of year. If you are not sure how to start one, just call your local fire and police departments. They can point you in the right direction. The U.S. Marine Corps offers Toys for Tots. You can sign up online to be a participating drop off center or click here. The deadline is Dec 16th. There are more details on their website. Yougivegoods is a website you can partner with as well. Just make sure to promote, promote, promote. If you have a reader board sign outside, make sure to state you are a toy dropoff center with the details. Make sure you put a poster in the window. You can create something using a poster board and don't forget to share on all your social media platforms.
2. Christmas Themed Photo Wall

A lot of antique stores and boutiques have a designated area within the store just for Christmas photos. This is usually a cozy fireplace/ Christmas tree scene. If you are a larger store you probably already have enough inventory to stage your area. You could pull items from your various booths (with dealer's permission of course) to create a space.
Don't forget to take a pic of your photo wall and share it on all your social media accounts. You need to get the word out as quickly as possible so people can start coming in and getting photos. Also, you will want to create a sign with a special hashtag so customers know how to tag your store in their photos. Once they start sharing their photos of your beautiful wall or space their friends will see it and want to come in for photos too.
If you don't have a mantle you could also create a winter scene with a window. Hang up a curtain over a windowpane and maybe paint some snow on the window. I'm sure you have some talented dealers at your store maybe you could take a vote to come up with the perfect theme.

3. Letters to Santa
Last but not least Letters to Santa. This has been popular for years. Lots of stores (not just antique stores) are getting in on the action for this one. Children love to write letters to Santa. So why not provide a mailbox for them. This way Mom or Dad have to make a special trip to your store. You can also have some blank letters available for little Jonny and Suzy. I have created one for you to print out and have ready. While this is pretty late in the game for this year, you could always have these for next year.

Please e-mail us at BoothCrush@gmail.com if you would like us to e-mail you the Dear Santa letter. Since blogger will not allow us to post a full-resolution photo we will have to email it to you.

Next, you will need a mailbox for the letters. I bet you could create something on your own, but in the event, you want a more professional look here are some options I found at Lowes and Walmart.


If you have created a mailbox for Santa we would love to see photos. Please feel free to share them on FB or email us at BoothCrush@gmail.com
- 5:46 PM
- 0 Comments
I have had lots of booths over the years. Some have been in little boutique style shops while others have been in large antique malls. In the five years that we have been running Booth Crush, I have shared very few photos of my booth/s. Many of you have asked why. The reason for that is we never wanted to cause any confusion with my booth and Booth Crush. We always felt like readers would get frustrated seeing a constant barrage of booth photos and we would lose reader retention. So we decided to keep them separate.
A couple of weeks ago, when I shared the blog post about the faux garden fence, I said I would share a full photo of my booth. So today I wanted to share the makeover photos. This is from my old booth at Queen of Hearts Antiques and Interiors. I have always loved the Queen of Hearts. They have three locations and it is hard to pick a favorite location because they each hold their own charm. I enjoyed my time there as a dealer. I was at the Marietta location and they have a great team there. They have guys on staff to help with loading, unloading and hanging things up in your booth. This was a huge perk. I miss all the gang. I would take another booth there in heartbeat, but I'm now living 70 miles away.
I still remember the day I got the call telling me a booth would soon be available. I was thrilled. There is always a long waitlist for dealers. I started out with a small booth because it was the only one available. I believe I had a 7x9 booth, but my old lady brain can't remember exactly. I was right in the middle of the store so I felt it was a good start. During this time I was trying to juggle home life, taking care of my uncle in the nursing home, two elderly parents with non-stop doctor appointments, my booth, sourcing, painting and my little dog that had suddenly fallen ill and would require daily meds and weekly to bi-weekly vet trips the rest of his life.
As I was approaching my one year anniversary with the Queen things seemed to be calming down for me. My booth was doing great and I felt I was ready to take on a bigger space. Unfortunately, the next one that was available wasn't much bigger but it was a longer booth. The one I was currently in had more depth. My new one was a 9x12, (I believe) but I loved the build-out and the work that had been done on it. I was fortunate to be in a place that allowed build-outs. If you have been a dealer for any length of time you know not all stores allow this.
I apologize for the grainy photos. My cell phone game was lacking shall we say. As you can see from the photos below this booth wasn't my style so it would need a makeover. I knew I had to lighten, brighten and freshen this space up. I had a vision and thankfully it wasn't going to take very much effort to change the look.


Here is the after shot. I promptly removed the miles and miles of grapevine wreath and then gave it two coats of paint. This was a soothing, peaceful color. Every time I worked my booth shoppers would stop and ask me about the color. So let me go ahead and answer your question here. The color is called Green Grey Linen by Valspar. For those of you that aren't familiar with this brand, you can find it at Lowes.
Boy, a little paint sure can change the look of a space. It made a world of difference. These photos do not do the paint color justice.


I know my booth wasn't large in comparison, but it was a size I could manage with my hectic schedule. Only two months into my new booth, my Mother had taken a serious fall on Christmas day. She broke her shoulder and had to have a total shoulder replacement. I stayed by her side for the next 14 days at the hospital. I was only able to make it to my booth one time over the next 30 days. Thank goodness for my sweet friend, Leslie and a very generous and thoughtful team at the store. With their assistance, I was basically able to put my booth in their hands and know that I was being taken care of. This gave me such peace of mind. I couldn't have done it without all their help. They were amazing.
If you are new or thinking about getting a booth somewhere I think it is very important to take a booth in a store where you have good management and people that will look after your booth should an emergency arise. This might be a question that you can ask them during the interview process.
Now here is a pic of my booth after move-in day. Do you see the garden fence panels at the top? For those that may have missed this post, you can click here to read how I turned Dollar Tree fence panels into this faux looking wrought iron.


Here is a pic from my first booth. As you can see it was a short booth, but it had depth. My second was longer.

I hope this little booth makeover inspired you in some way. As always we enjoy seeing your booth makeovers too. Please feel free to share your pics with us. If you have a major booth makeover and have before and after pics maybe we could feature your story here too. Please send all inquiries to boothcrush@gmail.com
For those of you that would like to visit the Queen of Hearts Antiques and Interiors you have three locations to choose from. Alpharetta, Buford, and Marietta. If you are looking for booth info you can read more about that on their vintage dealer page by clicking here. You can also find them here
- 3:53 PM
- 0 Comments

1. Make sure all of your items have price tags. I know we are all busy and there are times when we are in a hurry and forget to price something. Tags may also get torn off during the shuffle of moving things around. When you stop by your booth plan to spend a few extra minutes scanning over inventory.
2. Make sure your price tags are legible. You always want to make sure your tags are legible. If the staff is busy they may not have time to call you. It's unfair to them as well as customers that are waiting in line. I think hand written tags are very personal and I love seeing pretty cursive handwriting. If you are like me and have chicken scratch you could always print your tags. If printing is not an option for you, use rubber stamps for the price. I've seen tags where dealers write in the description info but use rubber stamps for the price. Rubber stamps are so inexpensive and you can them at any hobby store.
3. Be very specific with your item descriptions. The more descriptive your item is the less chance for tag switching. For instance, if you have a yellow, McCoy planter, don't just put "yellow ceramic planter" Be sure to put the maker, the color and the shape etc.


We have done posts on tags before so we won't go into depth here. If you are new or if you happened to miss those posts you can read them here. You will also find links to where we have shared free tag templates that you can download and print from home.
The Skinny on Price Tags
Creating Your Own Price Tags

4. Give some item history on your price tag. Most people love to know the history. I'm not saying you have to do this for every item. But for those special pieces try to include the history. If that cute fence gate came off a 100-year-old cottage, be sure to include info on your tag. The next time you are picking be sure to ask questions when applicable. Let your price tag tell a story.
5. Place a layaway tag next to your price tag. This next idea is great and I have only seen it done at The Queen of Hearts Antiques and Interiors If your store/Mall allows layaway then place a reminder tag on items that are applicable. A lot of customers may not know or maybe they forget this is an option. Seeing a tag might just be the nudge they need to purchase one of your items.

6. Have a cute price tag. I'm hanging my head in shame on this tip. I'm guilty of having plain, boring tags and every time I see a cute price tag -- I always say I'm going to step up my game. I need to practice what I preach because I'm a sucker for cute packaging. I have bought things in the past because it had a cute tag or ribbon or a little something extra.
How cute are these next tags? I once had a dealer tell me (not this dealer) that she only uses large tags. I asked her why and she said she had found over the course of her thirty plus years of selling it gets the customer's attention. Her logic was if they see a nice piece they may assume it's too pricey and not look at the tag. But if it is a large tag in their face, then they see that it is an affordable item and I just made a sale. The other reason she uses large tags is to discourage theft on smaller items.

The Skinny on Price Tags
Creating Your Own Price Tags
- 12:06 PM
- 0 Comments


